How to Make an Invoice
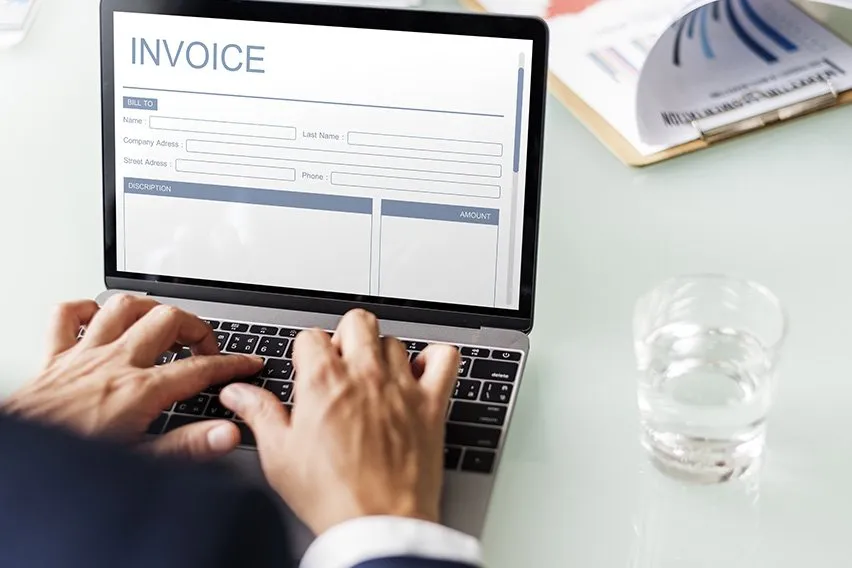
To make an invoice, you’ll need to create a professional document that outlines the services you complete for your clients, provides contact details for both your business and your client’s business, and includes the amount owed for your work and the invoice due date.
Add your company name at the top of this document, and be sure to include important company details such as your business address and a logo.
Invoices allow you to bill your clients for your services and help you track all the income you earn from your business. Creating a professional work invoice template allows you to get paid faster and spend less time managing your billing process.
Professionals already have enough to worry about without adding needlessly complex invoicing to the mix, which is why a free invoice template is the best way to easily and professionally bill clients.
FreshBooks offers unlimited access to 100% free invoice templates that are suitable for a wide range of industries, saving valuable time and money for business owners and freelancers.

Here are some helpful tips and free templates to show you how to make an invoice, how to write an invoice, and more:
- How to Make an Invoice: A Step-By-Step Guide
- How to Create an Invoice for Free
- What’s the Proper Invoice Format?
- How Do I Create an Invoice in Microsoft Word?
- How to Make a Professional Invoice
- Free Invoice Templates
How to Make an Invoice: A Step-By-Step Guide
If you’ve struggled to put together a professional-looking invoice, this guide is for you. We’ll provide step by step instructions below to help you get the best out of your invoicing, and get paid as fast and as accurately as possible.
Learning how to design invoices is a great way to stay on-brand when billing your clients. To make an invoice from scratch, you’ll need to follow these steps to ensure you’re including all the important information your client will need:
1. Create an Invoice Header with Your Business Information
At the top of your invoice, list your business information. Include the name of your business (if you’re a freelancer, this might just be your full name), the address of your business, your phone number and email address. If your business has a logo, include it in the header.
Having your business name right at the top helps you stand out, and is the best way for your clients to easily identify you and your company.
Contact information should closely follow, as it is the all-important step of letting the customer easily reach you (and pay you!).
2. Include Your Client’s Contact Details
Next, include all your client’s contact details. Make sure you list the correct contact person to receive your invoice. It’s a good idea to verify the best contact person with a new client before sending your first invoice. List the company’s address, customer name, phone number and the email address for your point of contact.
3. Provide Invoice Information
Every invoice you send should include a unique invoice number to help you easily keep track of the different invoices you send. Choose an invoice numbering system that works for you and stay consistent to avoid confusion. The easiest way to number invoices is to start with your first invoice as Invoice 1 and count up from there. However, as the number of invoices increases, the process can become more complicated. Therefore, it becomes essential to learn how to make invoice number change automatically in Excel to ensure the process remains easy and smooth.
You’ll also want to include the date your invoice was issued. Having an invoice date makes any future referencing much easier, and helps keep track of everything during tax season.
4. Specify Your Payment Terms
It’s important that your invoice clearly specifies when and how you expect clients to pay you. Include an invoice due date. It’s common among freelancers to use a 30-day billing cycle, so if you issue an invoice on April 1, payment is due 30 days later, on May 1. You will also want to include information about the payment methods you accept (i.e. credit card, check, PayPal, etc.). If you charge late fees, clearly outline the late fee terms on your invoice. It’s a good idea to discuss all your payment terms with a client when they first sign on, so they’re not taken aback by any of the details when you send your first invoice.
Most importantly, make sure your payment information including bank details are clearly stated, so there are no hold-ups for when it’s time to get paid. If your payment options change, you can always update at a later date (it’s best to do this as quickly as possible).
5. Include an Itemized List of Services
To be as transparent as possible, it’s important to include an itemized list of the services rendered for the invoice period. It’s easiest to present this information as a table with columns that include:
- Services Rendered
- Date
- Quantity / Hours
- Rate
- Subtotal
If you are not sure how to write an invoice for the services rendered, check our comprehensive article where we explain the step-by-step process along with an invoice for services rendered example.
6. List Applicable Taxes
The taxes you collect from clients will vary depending on your location and type of business. It’s a good idea to do some research through your local tax bureau to find out how much tax you should charge your clients.
7. Consider Adding Notes
While not necessary, you might want to add a note at the end of your invoice that includes a friendly thank-you message for your client. Not only is it good for your brand, common courtesy like a simple thank you can actually help you get paid faster.
How to Create an Invoice for Free
To create an invoice for free, you can create your own using Microsoft Word, Microsoft Excel, or Google Docs. For guidance, check out our post on how to make an invoice on Google Docs. You can use a premade invoice template offered by the program you choose, or you can create your own invoice from scratch.
To make a free invoice that looks professional and unique, you can download free small business invoice templates that you can then personalize according to your needs. FreshBooks offers free professional invoice templates you can download for self-employed and freelance businesses.
Our invoice generator software can be accessed using your laptop or phone. We have one of the best invoice apps which lets you log in to your account and send invoices quickly, from anywhere that you may be.
If you want to create your own personalized invoice in Excel, you can follow our guide on how to create an invoice in Excel for a detailed, step-by-step process to create a professional-looking invoice.
What’s the Proper Invoice Format?
Here is the standard invoice format, along with a sample:
- Your business information appears at the top of the invoice as a header.
- Next, your client’s billing details are clearly listed below your business information.
- Beside the client’s billing details, include an invoice number, date of issue and payment due date.
- Ensure the invoice total is listed in bold in the top portion of your invoice so clients can easily see what they owe you.
- Include an itemized list of the services rendered with a brief description, cost, quantity or hours, and a subtotal amount.
- Include the total amount due at the bottom of the invoice, along with applicable taxes.

How Do I Create an Invoice in Microsoft Word?
Microsoft Word offers easy-to-use, professional-looking invoice templates to help you build your first invoice. If you’re familiar with their software, this can be a good starting place for business owners who are new to creating invoices. It’s not as streamlined and automated as a cloud-based invoicing solution, but it’s a good first step.
For more information on how to generate invoice templates, follow our step by step process below.
Here’s how to create invoices in Microsoft Word:
- In Word, click the File menu and select New From Template.
- Use the search bar in the top right corner and search for “Invoice”.
- Select the Invoice Template you’d like to use from the options offered.
- Customize the header with your business information and logo.
- Include your client’s contact details.
- Clearly outline the invoice number, issuing date, due date and payment terms.
- Detail all the services you provided for the client with descriptions, charges per item, taxes and subtotals.
- Include the total amount due for the invoice, in bold.
- Include a footer with any notes you’d like to add, such as a brief thank-you message.
Visit our article on how to make an invoice in Word for more information.

How to Make a Professional Invoice
To make a professional invoice, you can purchase cloud-based invoicing software. Invoicing software gives you more options and more support for creating and tracking your invoices. An invoice generator tool will keep your information optimized and save you the hassle of creating one yourself.
Here are a few benefits of cloud-based invoicing solutions:
1. More Customization Options
Invoicing software gives you further customization options, which can help establish your brand identity. You can customize fonts and color schemes, change the style of your invoice and include logos. Selecting a professional font or design scheme to suit your company keeps everything on-brand and professional.
Let your company stand out with custom invoices to increase your brand awareness and legitimize your business.
2. Easier Billing and Faster Payments
Your clients’ billing information is stored in the system and invoice numbers are generated automatically, so you can create invoices faster using cloud-based invoicing software. Invoicing software also allows clients to pay directly from the invoice, so you can get paid faster. Instead of mailing invoices and waiting for return payment by mail, which can hold up the payment process, choosing to email invoices can be the quicker solution.
3. Track Your Sales
Invoicing software saves all your past invoices and offers a dashboard that helps you easily track your sales. You’ll be able to see your paid invoices, outstanding invoices and overdue invoices all in one place.
4. Access from Anywhere
Cloud-based solutions allow you to access your invoices from anywhere, since they’re not saved to a specific device. You can login to your account to create an invoice or record a payment from home, your mobile device or the office. An invoice maker is a perfect solution for a busy entrepreneur or business owner with more important tasks on their mind.
5. Increased Security
Cloud-based invoicing offers the added protection of data encryption, which keeps all your business and client information secure. Most cloud-based solutions are more secure than storing invoicing data on your work computer.
6. Simplified Reporting
Cloud-based accounting software offers the ability to quickly generate reports to give you a clear view of your business finances. You can compare your sales over different periods and easily monitor unpaid invoices.
Free Invoice Templates
Free invoice templates can help you quickly prepare professional-looking invoices to send to your clients. Without having to wade through unnecessary red tape, you can easily create an industry-specific invoice to suit your needs. To learn how to create invoices instantly, read our article on How to Make Invoice for Business or You can download free invoice templates for a variety of platforms; here are a few to choose from:.
FreshBooks offers professional, easy-to-use free invoice templates for the following formats:
- Free PDF invoice template
- Free Word invoice template
- Free Excel invoice template
- Free invoice for Google Docs
- Free invoice for Google Sheets
More Useful Resources
- How to Make a Service Invoice
- How to Make a Commercial Invoice
- How to Make an Interim Invoice
- How to Make an Invoice Without a Company
RELATED ARTICLES

 How to Invoice a Client: 10 Steps to Get Paid on Time
 What Is the Purpose of an Invoice?
 13 Types of Invoices Every Business Should Know
 How to Make an Interim Invoice | Progress Billing for Small Businesses
 How to Make a Commercial Invoice: Guide for Businesses with Templates
 How to Fill out an Invoice | Professional Invoicing Checklist