Receive Online Payments with Checkout API
Did you know FreshBooks now offers Checkout Links? Now it’s even easier to receive payments from your customers.
Checkout Links allow you to create unique payment links to collect online payments without needing to make an Invoice first. Post Checkout Links on your website, social media, or anywhere online to let your customers click and pay for items or services at a fixed price with their credit card or bank account. Most importantly, our Checkout Links are PCI-DSS compliant!
Typical Use Cases
- You have a website and want to receive payments directly from a webpage, without the hassle of sending an Invoice to each of your customers
- You have a client who isn’t great at keeping on top of outstanding invoices. Instead of re-sending them, you can simply text your client a checkout link!
- You have a social media page where you want to accept payments, but you can’t add every customer as a Client. No problem! Include a Checkout Link in your bio
You Can Create Checkout Links in Five Easy Steps
-
Get Authenticated
-
Create an Item or a Service
-
Call the Checkout Link Endpoint
-
Enable a Payment Processor on the Checkout Link
-
Render the Checkout Link on your website or preferred media
Before you begin, you’ll need:
- Access to our Postman Collection
- To authenticate all your requests by following this simple guide
- To enable FreshBooks Payments or Stripe Payments (Refer to Enabling Online Payments On An Invoice for a walkthrough on how to do this)
- Somewhere to place your Checkout Link (like a webpage or social media account)
Let’s get started!
Step 1: Get Authenticated!
Not sure how to authenticate your requests? No problem, simply refer to the tutorial on Authenticating With 0Auth 2.0.
Already authenticated? Great. Note the Bearer token; you’ll need it in Steps 2 & 3
Step 2: Create an Item or a Service
This is the item/service being paid for by your clients. These items/services can be tangible or intangible. Note the item_id from the Create Item Response, you’ll need it when creating the Checkout Link.
You can check out the full API specification on how to create an item here.
Step 3: Invoke the Checkout Link API
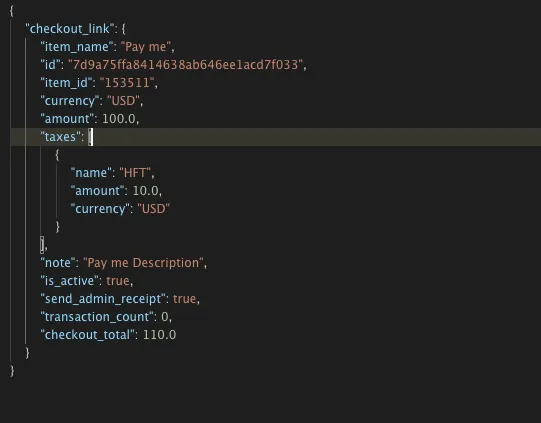
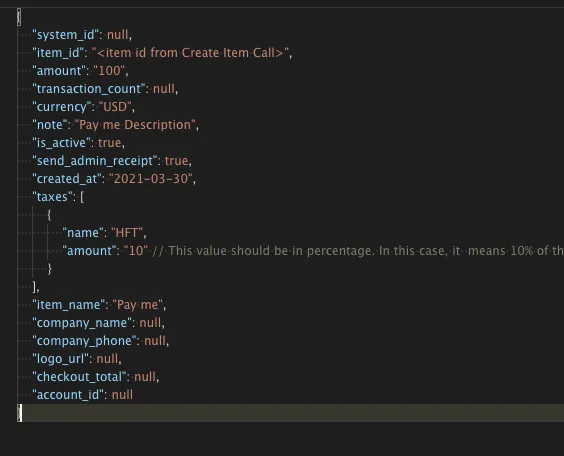
Send an authenticated POST request to the endpoint, passing in the item_id from Step 2.
You can check out the API specification of how to create a Checkout Link here.
Endpoint
Request
Response

Step 4: Enable a Payment Processor on the Checkout Link
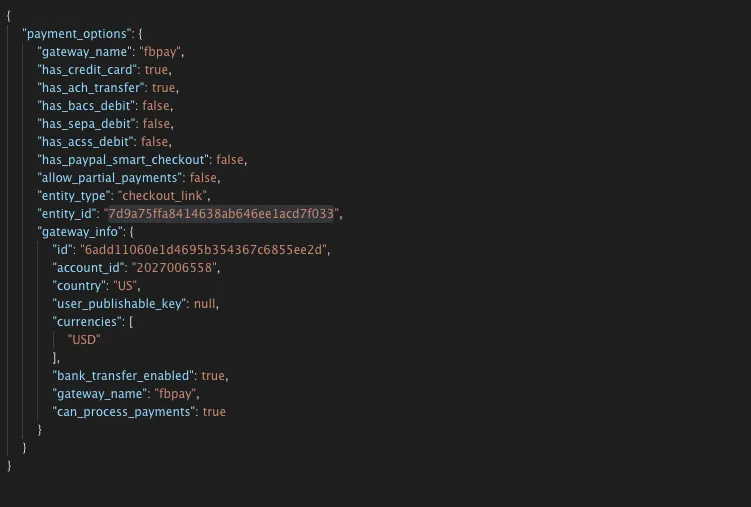
Now we’ll enable our preferred Payment Processor on the Checkout Link by making a POST to the payment options endpoint.
Pass the id from step 3 as entity_id
To determine the value for gateway_name, reference this tutorial to learn how to check which Payment Processor is available to you. It’s typically either fbpay or stripe.
Check out the API specification for this step here
Endpoint

Request

Response

Step 5: Concatenate the Checkout Link id to a base URL and share on any medium
Concatenate the id from Step 3 or entity_id from Step 4 (7d9a75ffa8414638ab646ee1acd7f033) to the base URL: https://my.freshbooks.com/#/checkout to get the full Checkout Link URL.
Example Checkout Link URL: https://my.freshbooks.com/#/checkout/7d9a75ffa8414638ab646ee1acd7f033
Now you’re ready to add the Checkout Link to your website, a social media platform or collect payments in an app with webview.
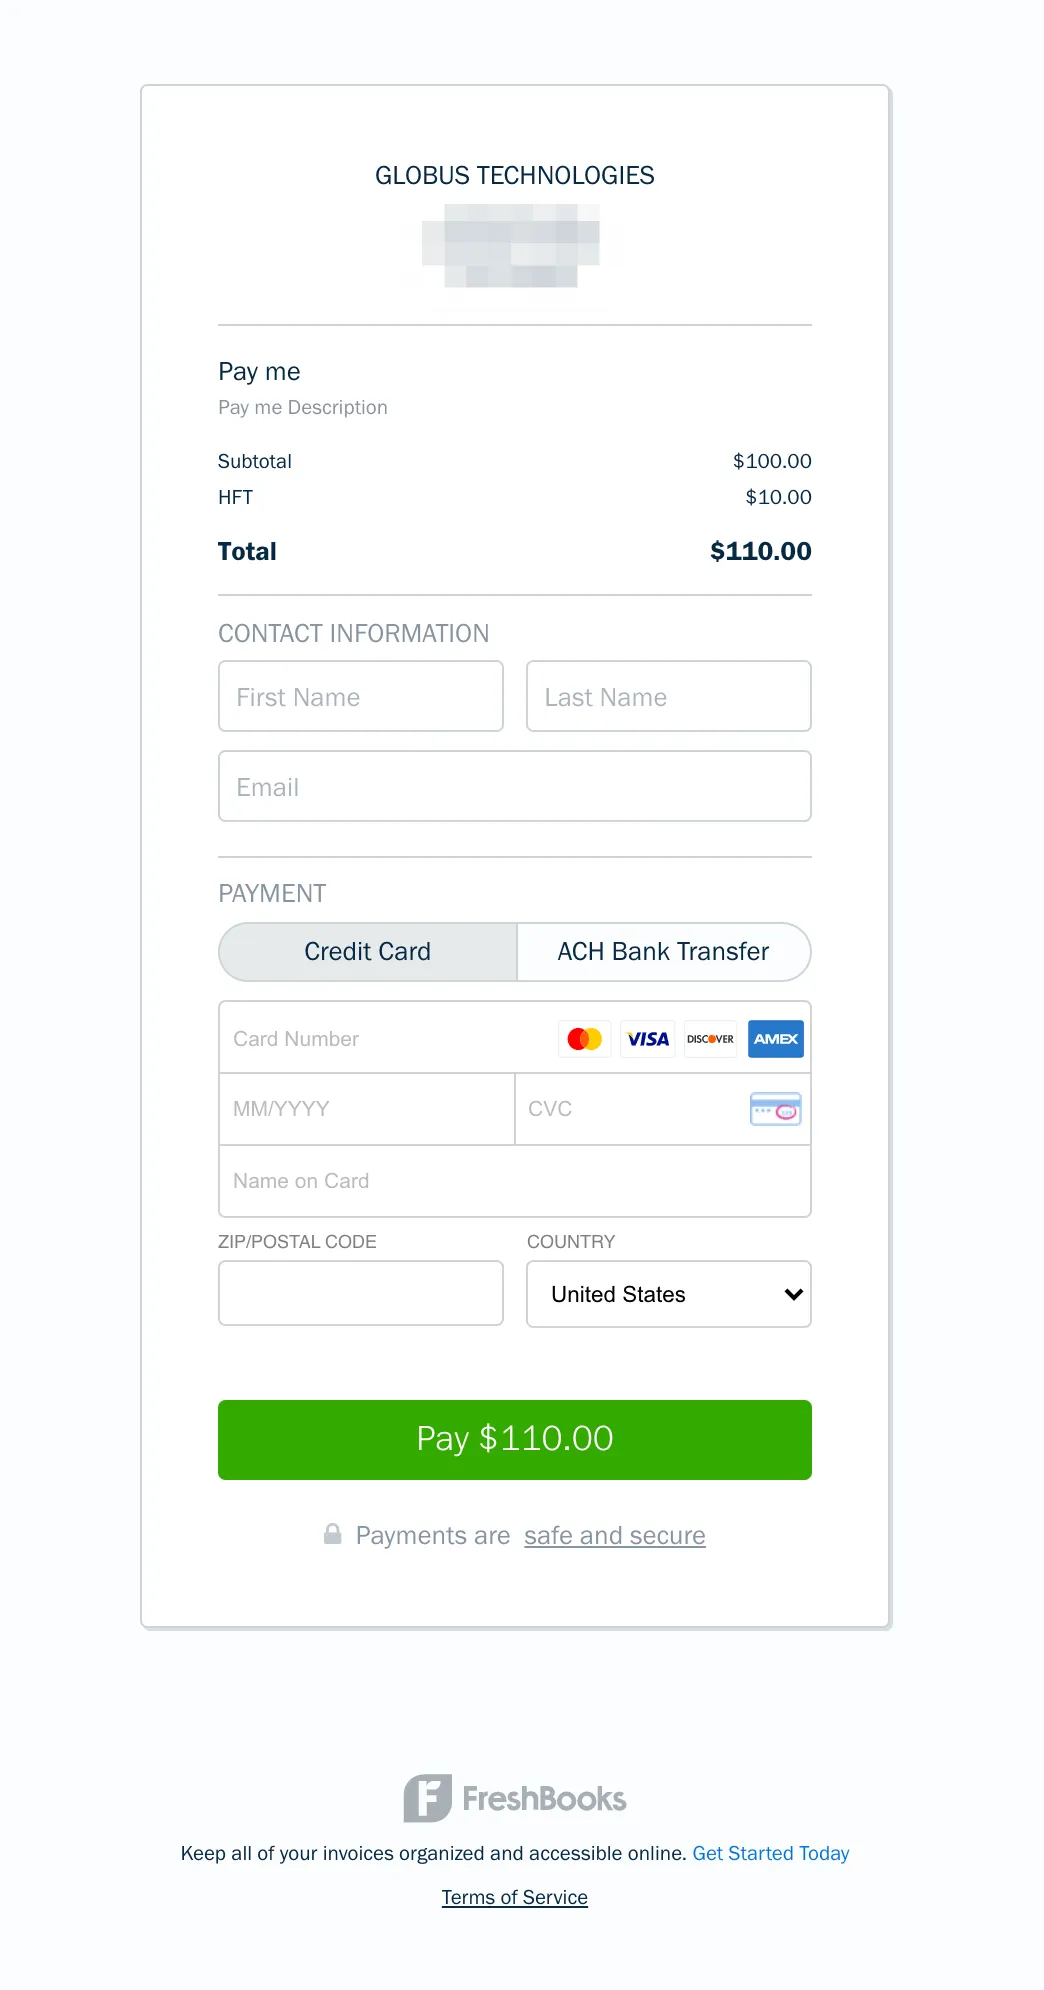
Here’s what my Checkout Link looks like after following the five steps and rendering it on my browser:
Step 6: Start Receiving Payments on Your Website!
Still have questions? Something isn’t working right? Don’t hesitate to reach out to api@freshbooks.com.
We’ll respond to your request as quickly as we can!


